INSTALLATION INSTRUCTIONS

Before you begin, read the installation instructions below. Observe all local building and safety codes.
Unpack and inspect for any shipping damages. If you find any damages, do not install. Contact Customer Service. If you need assistance while installing your shower system, call our Customer Service number.
We recommend consulting a professional if you are unfamiliar with installing bathroom fixtures and plumbing.
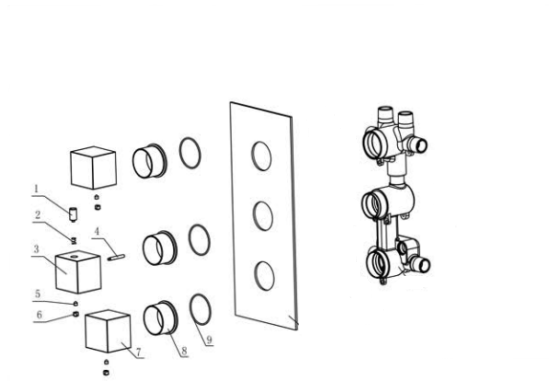
THERMOSTATIC VALVE INFORMATION
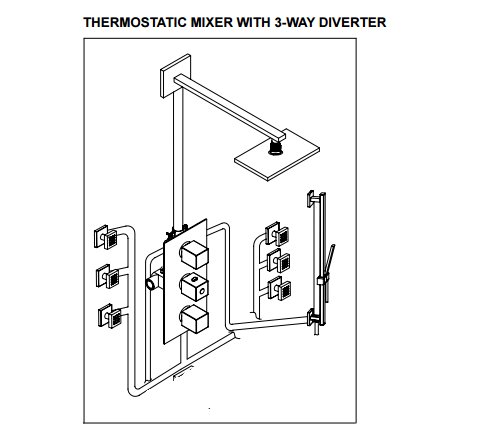
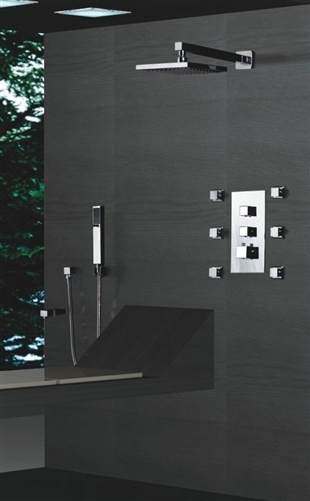
- The thermostatic shower system features three valves that allow you to keep water temperatures consistent each time the shower is used and create a customized shower system.
- Valves A and C are attached to the rainfall shower head and hand shower. These valves operate independently from one another allowing both outputs to be used at one time.
- Valve B connects conventionally to your hot and cold water supply with the hot water on the left and the cold water on the right and is used to control the water temperature.
TOOLS AND MATERIALS:
- Screwdriver
- Teflon Tape
- Adjustable Wrench
- Smooth Joint Pliers
- Soft Cloth
- Silicone Sealant
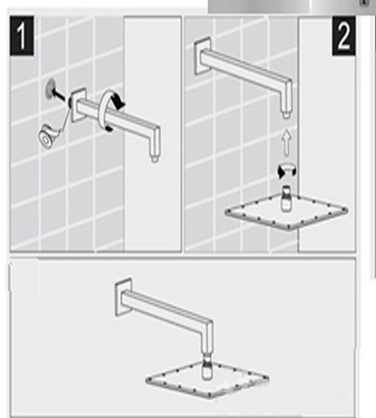
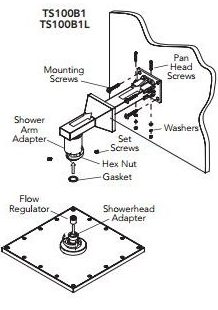
SHOWER HEAD INSTALLATION
1. Apply plumber’s tape to the threads on both ends of the shower arm and slide on the decorative escutcheon.
2. Insert the new arm into the fitting in the ceiling and twist to tighten. Finish tightening with your adjustable wrench. Wrap a dry cloth around the shower arm to protect the finish while tightening with adjustable wrench.
3. Thread the new shower head onto the arm and hand-tighten. Hold the shower arm in place with groove joint pliers and finish tightening the shower head with your adjustable wrench. Wrap both in a dry cloth to protect the finish.
4. Before securing the decorative escutcheon, turn on the water supply to make sure that all connections are tight and there is no leaking. If no leaks are detected, continue with the installation. If leakage does occur, use your adjustable wrench to tighten the connections as necessary. If problems persist, contact Customer Service.