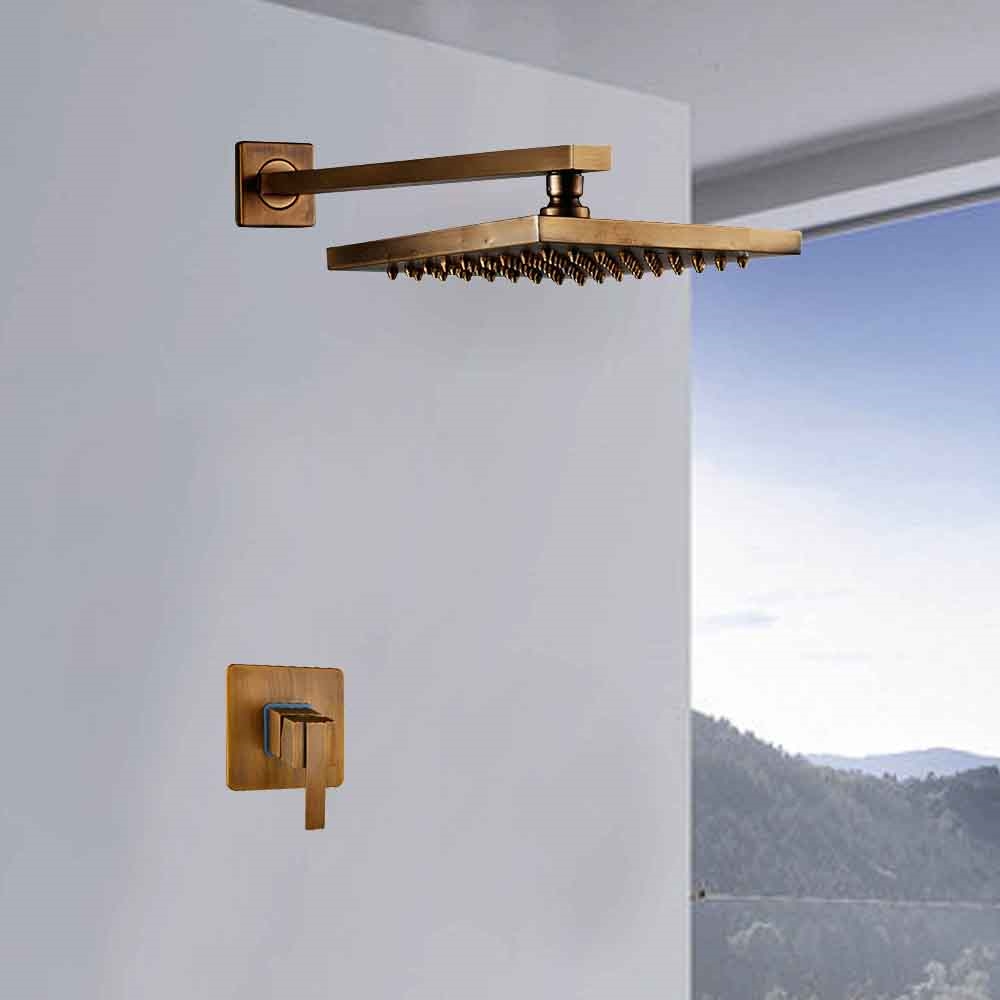
Installation Instructions
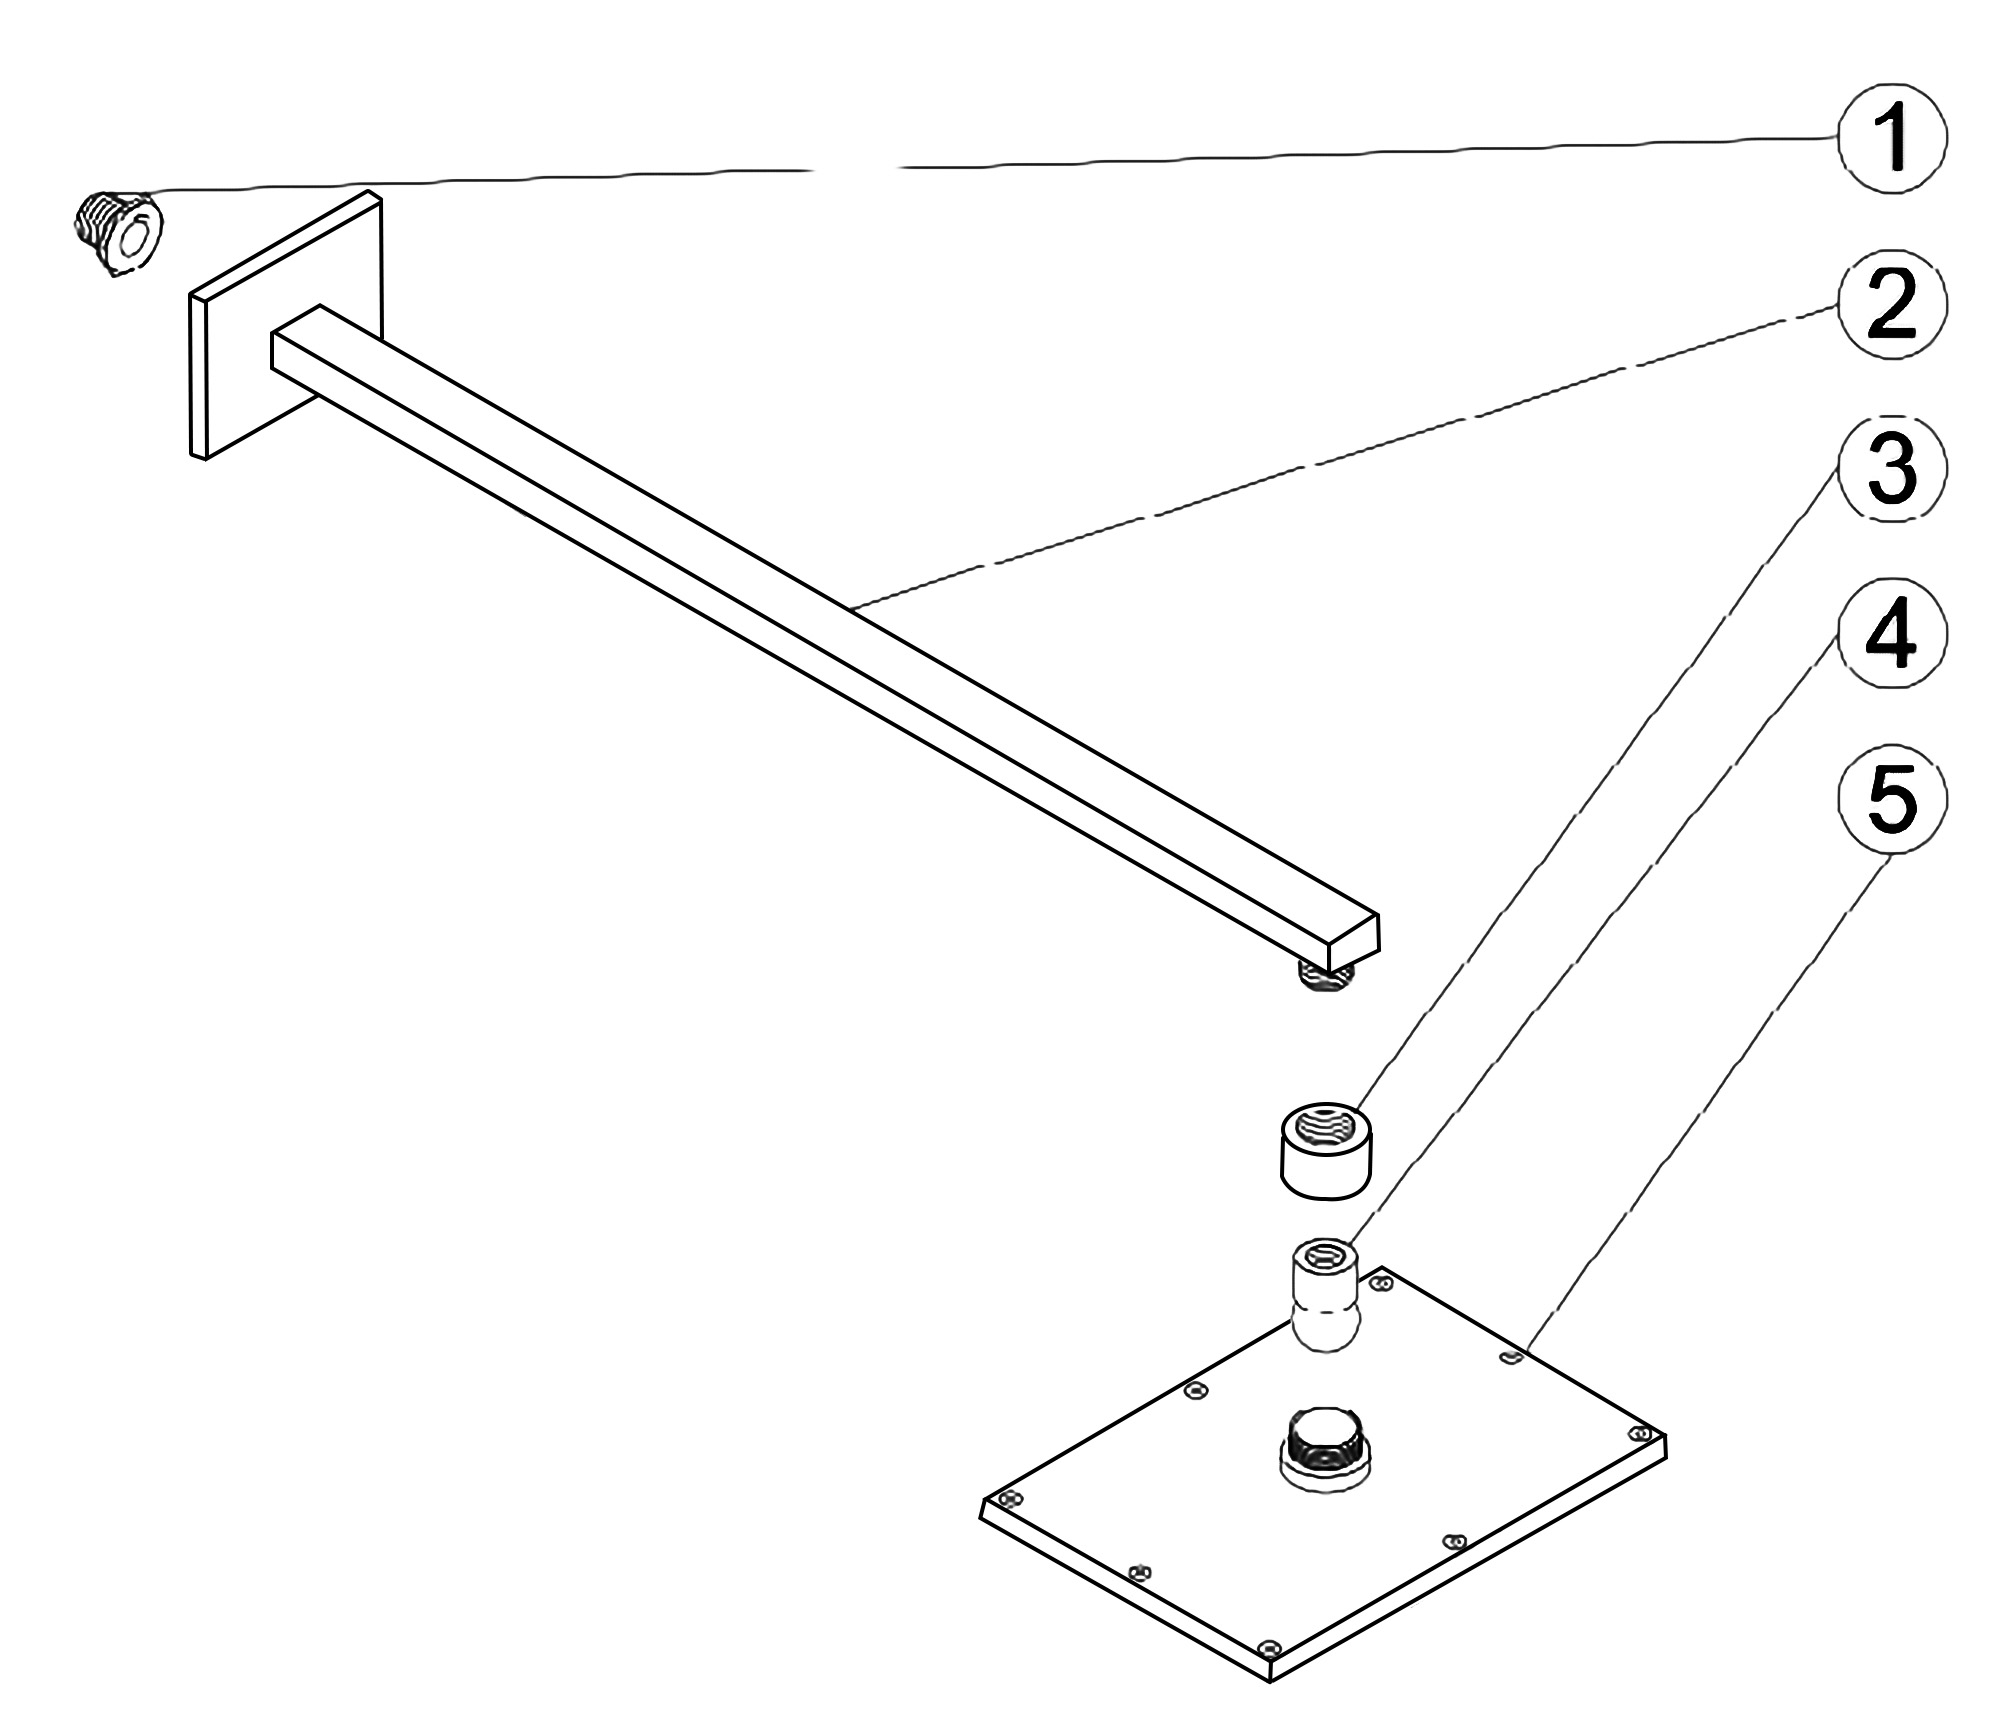
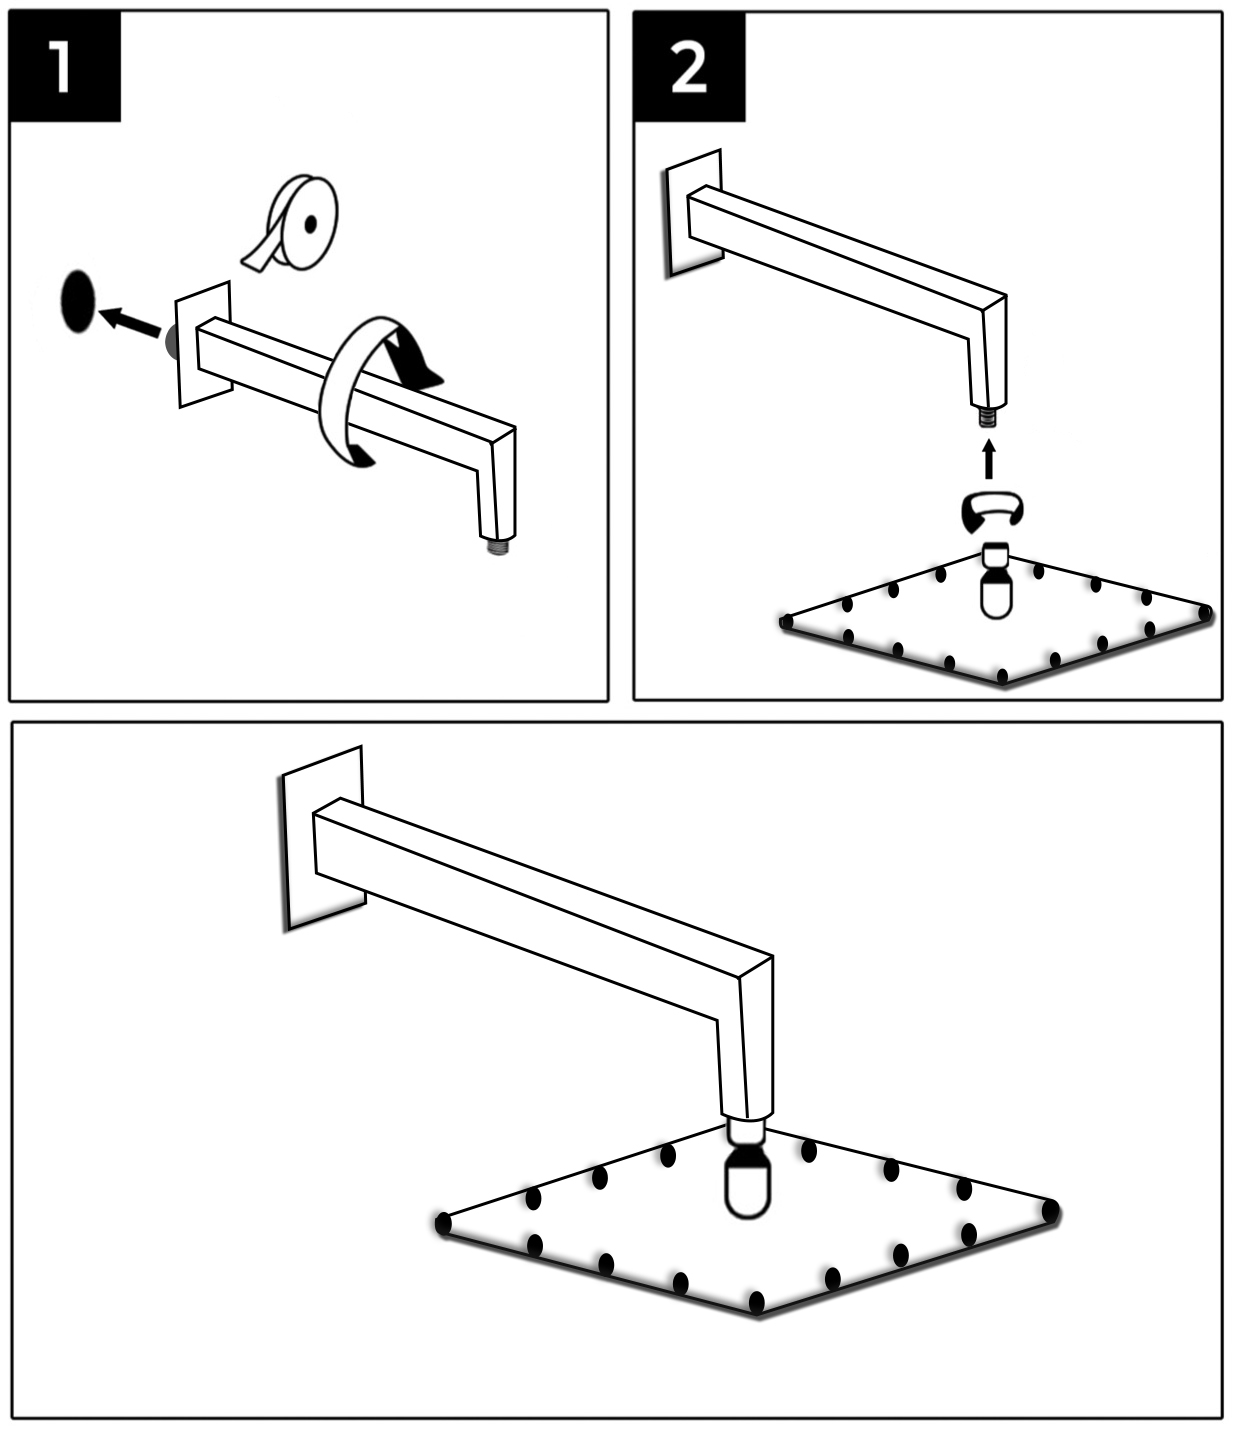
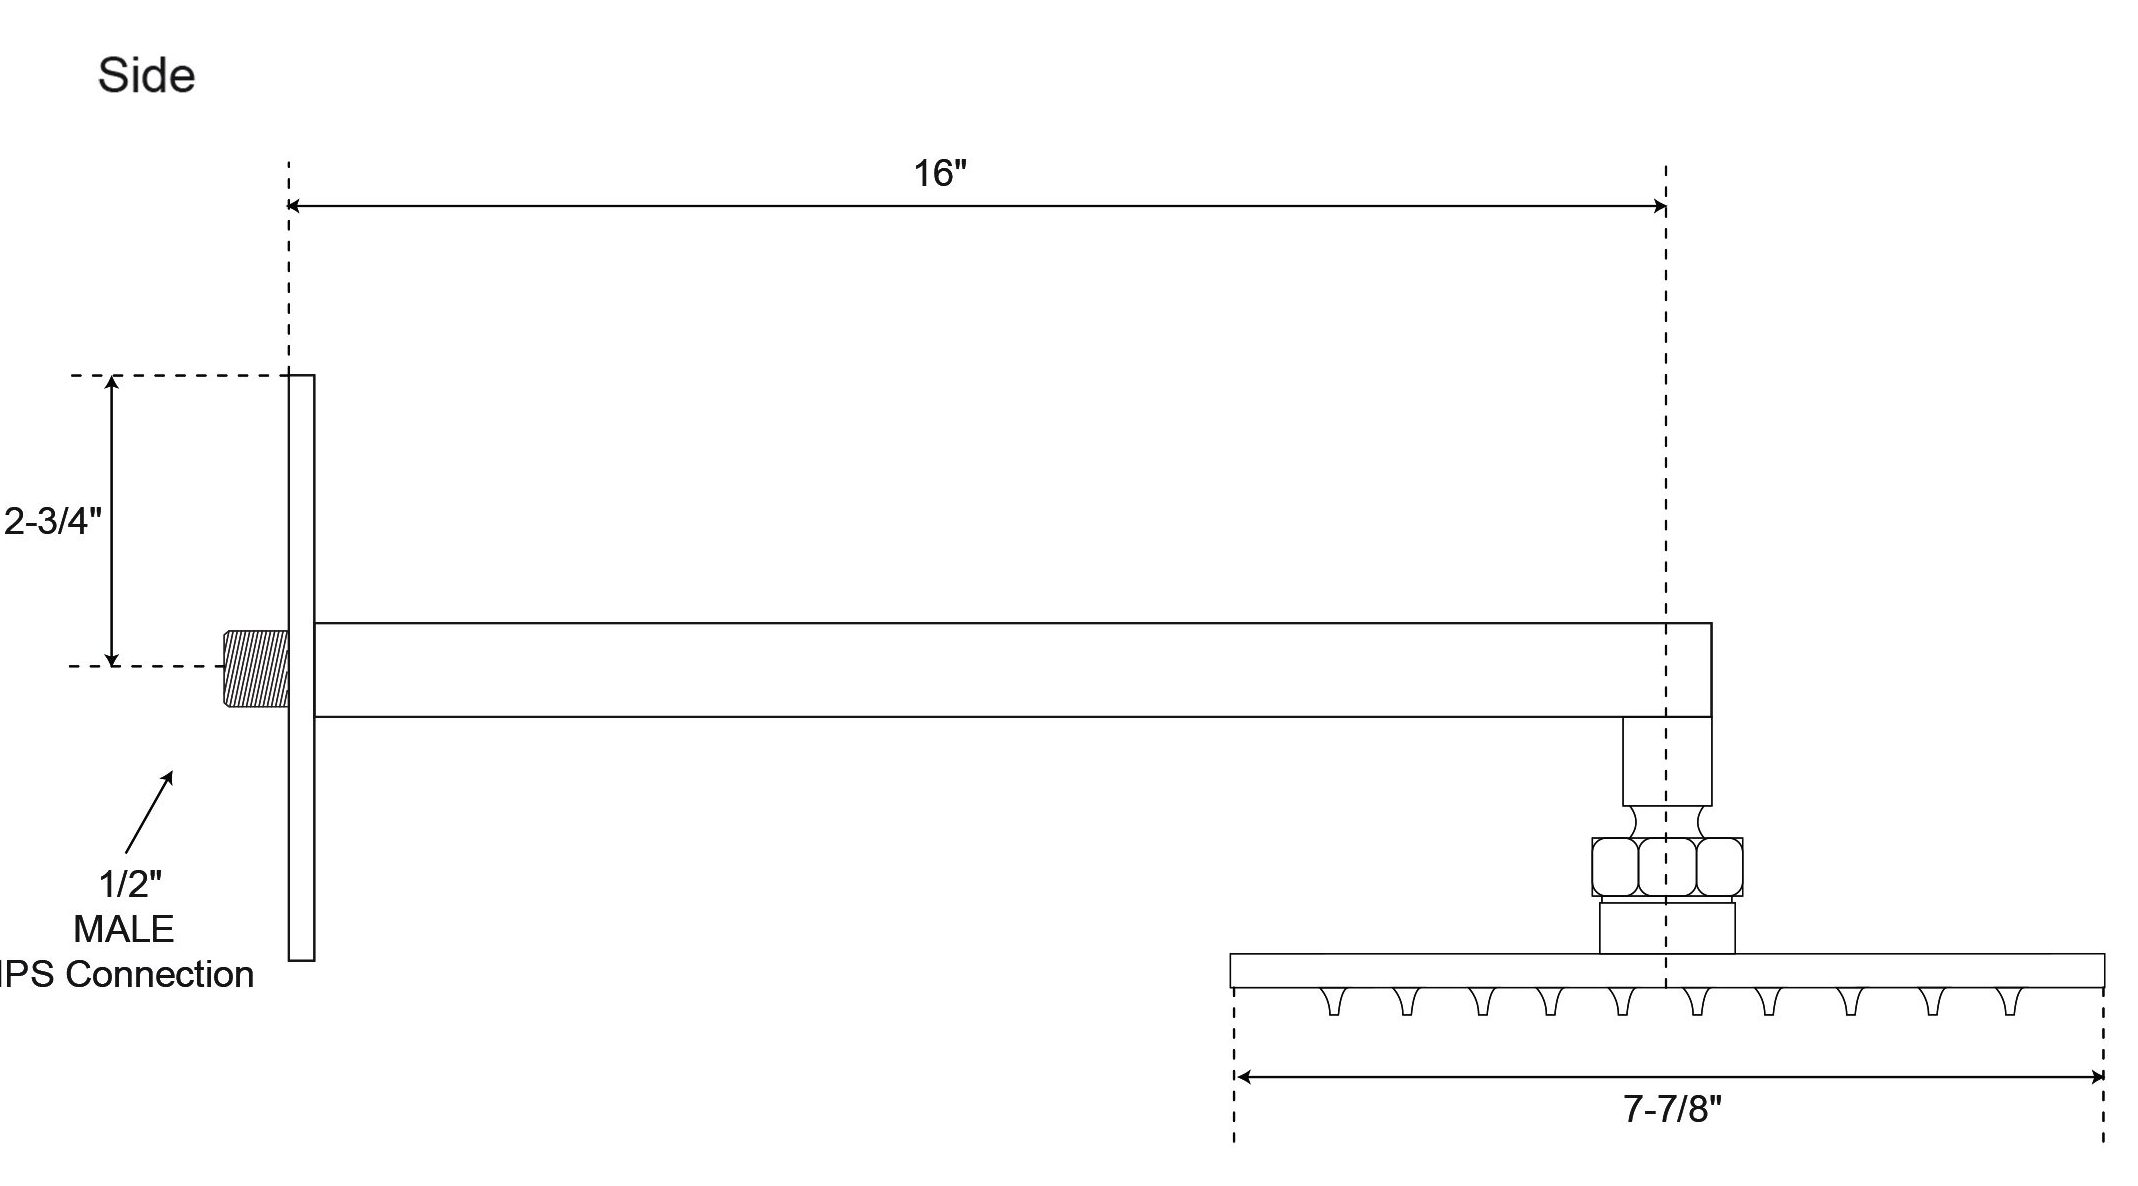
No tools required, ½ connector fits standard sized shower plumbing.
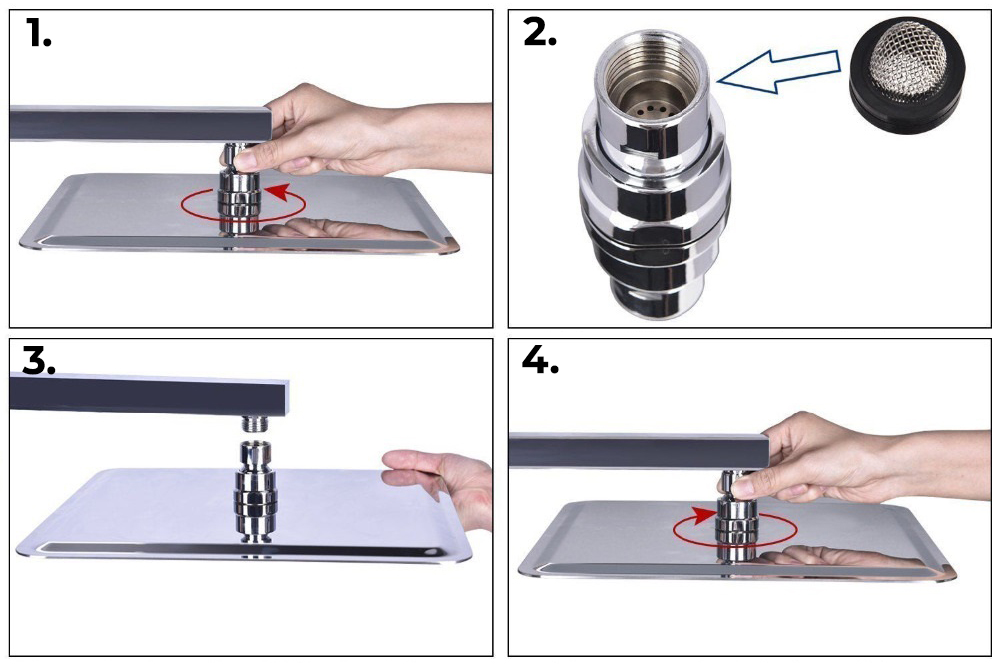
- Use your hands counter clockwise to unscrew the old showerhead and removed it.
- Take out the showerhead, make sure the shower filter is placed in the connector.
- Ensure the showerhead full horizontal alignment wall mounted shower arm thread.
- Use your hands clockwise to tighten showerhead.
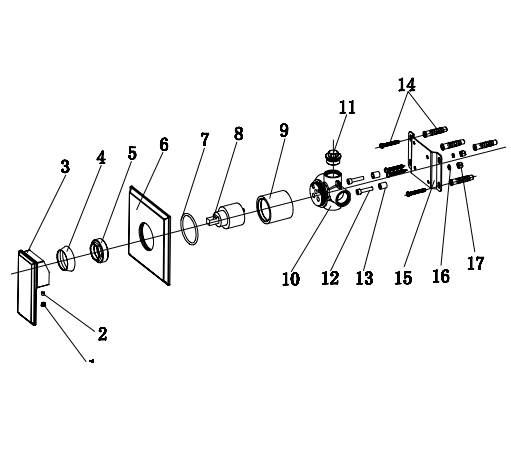
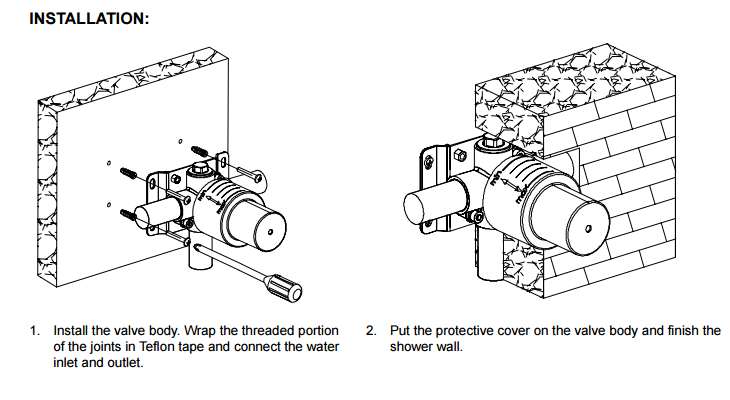
1. Install the valve body. Wrap the threaded portion of the joints in Teflon tape and connect the water inlet and outlet.
2. Put the protective cover on the valve body and finish the shower wall.
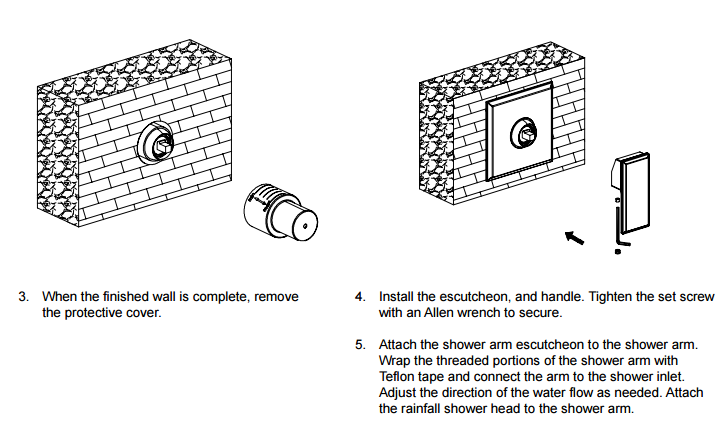
- When the finished wall is complete, remove the protective cover.
- Install the escutcheon, and handle it. Tighten the set screw with an Allen wrench to secure.
- Attach the shower arm escutcheon to the shower arm. Wrap the threaded portions of the shower arm with Teflon tape and connect the arm to the shower inlet. Adjust the direction of the water flow as needed. Attach the rainfall showerhead to the shower arm.

