
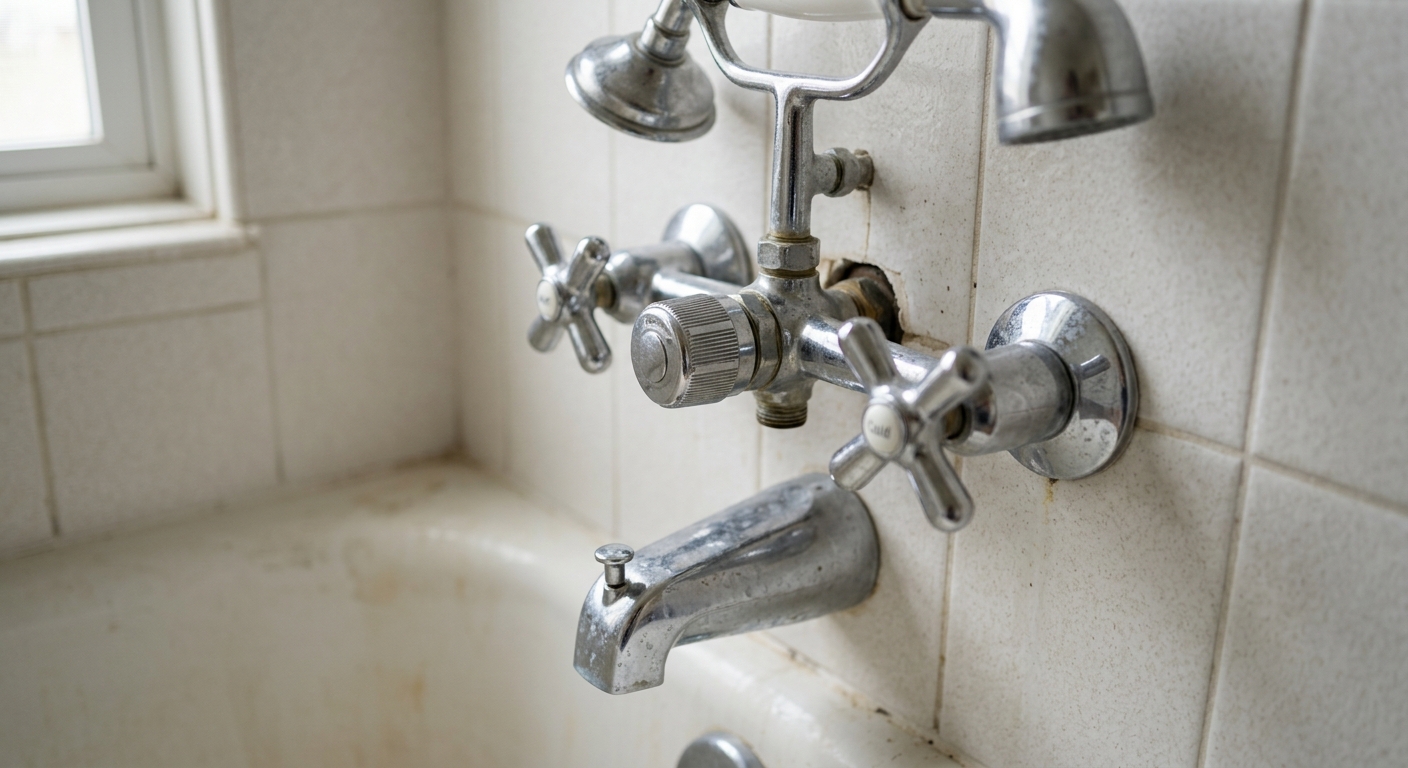
Water not switching from tub spout to shower head almost always comes down to one of three mechanisms, and each one fails in a different way. Before you pull anything apart, spend five minutes identifying which type you have. That single step will save you an hour of unnecessary teardown and a wasted trip to the hardware store for the wrong parts.
Identify Your Diverter Type First
There are three common setups. Look at your tub spout and valve handles to figure out which one you’re dealing with.
- Tub-spout gate diverter: A single spout with a small pull-up knob on top. Lifting the knob raises an internal gate that redirects water up to the shower head. This is the most common setup in homes with one shower valve handle.
- Three-valve tee diverter: Three separate handles on the wall: hot, cold, and a middle diverter handle. Turning the middle handle routes water to the shower head instead of the spout. Common in older homes built before single-handle valves became standard.
- Cartridge-style diverter (2-handle or single-handle with integrated diverter): No separate diverter handle or knob. The valve itself has a pull, twist, or button function built into the main handle or trim that shifts flow internally.
If you’re not sure, run the shower with the spout diverter engaged (or the middle handle turned, if you have three handles) and watch where the water goes. A partial flow to both spout and head is a strong clue about which category you’re in, and that detail matters for the diagnostics below.
Tools and Parts on Hand
Gather these before you start. Having them staged means you can move straight from diagnosis to fix without stopping mid-job.
- Adjustable wrench or channel-lock pliers
- Allen key set (for set-screw spouts)
- Flathead and Phillips screwdrivers
- Penetrating oil or lubricant (silicone-based, not petroleum, if it will contact rubber seals)
- Replacement O-rings, washers, or stem assembly (type depends on diagnosis)
- Old toothbrush or small wire brush for mineral deposits
- White vinegar for soaking, not scrubbing alone
- Flashlight or headlamp
- Rag and small bucket for water catch
Budget 20 to 45 minutes for diagnostics alone, before you make a parts run. That window covers removing the spout or handle, inspecting the mechanism, and confirming what’s actually broken. Rushing this step is the most common reason people replace the wrong part.
Tub-Spout Gate Diverter Diagnostics
First, determine how your spout attaches to the wall. This changes your entire approach.
- Slip-fit spout: Slides over a copper stub-out and is held in place by a set screw underneath, near the wall end. No threads involved.
- Threaded spout (1/2 in. IPS): Screws directly onto a threaded pipe nipple. No set screw. You’ll see the spout thread pattern if you look up into the wall-side opening.
For a slip-fit spout with a set screw, loosen the screw with an Allen key, then pull the spout straight off. Do not force it side to side, since that can bend the stub-out. Once removed, look inside the spout for the vertical gate mechanism. Mineral buildup or a corroded rubber gasket at the base of the gate is the usual culprit. Clean the gate channel, replace the O-ring if it’s cracked or flattened, and reinstall.
When reinstalling a set-screw spout, snug the screw enough to prevent the spout from rotating under normal hand pressure, but stop as soon as it’s tight. These screws thread into soft brass or the spout body itself, and over-tightening strips the threads, which means the spout will spin loose again within weeks. There’s no torque spec published for these because spout bodies vary, so use just enough force to stop rotation.
For a threaded spout, unscrew it counterclockwise (some are reverse-threaded, so if it won’t budge, try clockwise before assuming it’s seized). Inspect the diverter gate the same way. If the spout itself is cracked internally or the gate mechanism is fused with mineral scale, replacement is usually faster than rebuilding, since these are inexpensive and rarely sold with rebuild kits.
Three-Valve Tee Diverter Diagnostics
This setup routes water through a diverter valve located inside the wall, controlled by the middle handle. The failure point is almost always the diverter stem, not the spout.
Turn off the water supply to the tub and shower before doing anything here. Remove the middle handle (usually one screw under a cap, or a set screw on the handle shank) and pull the stem straight out. Look at the tip of the stem, the part that seated inside the valve body. Mineral buildup on this stem is the single most common failure mode in three-valve setups. Hard water deposits accumulate on the rubber or neoprene washer at the tip and on the stem threads, which prevents the stem from seating fully and redirecting flow.
Soak the stem tip in white vinegar for 15 to 20 minutes to loosen scale, then scrub gently with an old toothbrush. Check the washer at the tip: if it’s compressed flat, torn, or hardened, replace it before reassembling. If the stem threads are corroded or the stem doesn’t move smoothly through its full range by hand, the stem itself needs replacing, not just the washer. Bring the old stem to a plumbing supply store for a match, since thread pitch varies by manufacturer and era.
Cartridge-Style Diverter Diagnostics
These are built into the main valve cartridge, so there’s no separate diverter part to inspect from outside. Shut off water supply first. Remove the handle and escutcheon (trim plate) to expose the cartridge.
Pull the cartridge straight out, noting its orientation for reinstallation. Inspect the O-rings and the diverter port, a small secondary opening on the cartridge body that redirects flow to the shower head. Debris or mineral buildup lodged in this port is a common cause of partial or no diversion. Clean the port and surrounding O-rings, then test the cartridge by hand before reinstalling. If the internal diverter mechanism feels gritty, doesn’t spring back, or is visibly worn at the sealing surfaces, cartridge replacement is the fix. These are matched to brand and model, so take the old cartridge with you when sourcing a replacement rather than guessing from memory.
When to Replace vs Rebuild
Use this comparison to decide once you’ve completed diagnostics for your specific type.
| Diverter Type | Rebuild If | Replace If |
|---|---|---|
| Tub-spout gate | Gate mechanism intact, only O-ring worn | Spout body cracked, gate frozen with scale, set-screw threads stripped |
| Three-valve tee | Stem tip scaled but threads and washer seat are sound | Stem threads corroded, washer seat damaged, stem won’t travel full range |
| Cartridge | O-rings worn but diverter port and internal seals intact | Diverter port damaged, cartridge won’t seal in diverted position, brand-specific rebuild kit unavailable |
Rebuilding is almost always cheaper and faster when the core mechanism is sound and the failure is limited to a washer, O-ring, or surface scale. Replacement makes sense once you’re looking at cracked housings, stripped threads, or a cartridge that won’t hold its diverted position even after cleaning.
If you’re already planning to replace the spout or trim, this is also a reasonable time to reconsider the shower head itself, particularly if you’re dealing with a fixed 2.5 gpm head that no longer sprays evenly or a worn out flow restrictor. Matching new trim to a matching fixture set at the same time avoids a second disassembly later, since you’ll already have the wall opened up and the water shut off.
Once you’ve matched your diagnosis to the table above, reassemble in reverse order and turn the water supply back on slowly to check for leaks at every connection you touched. Run the diverter through a full cycle, tub to shower and back, before closing up any access panel. If you’ve cleaned, replaced parts, and the diverter still won’t hold its position after a proper reassembly, the issue is likely a valve body problem behind the wall rather than the diverter parts themselves, and that’s where it’s worth bringing in a licensed plumber to inspect the rough-in plumbing.