BathSelect 15″*20″ Large LED Shower Shead with 2 Way Mixer & Handshower, All in One Installation Manuals
Installation Instructions

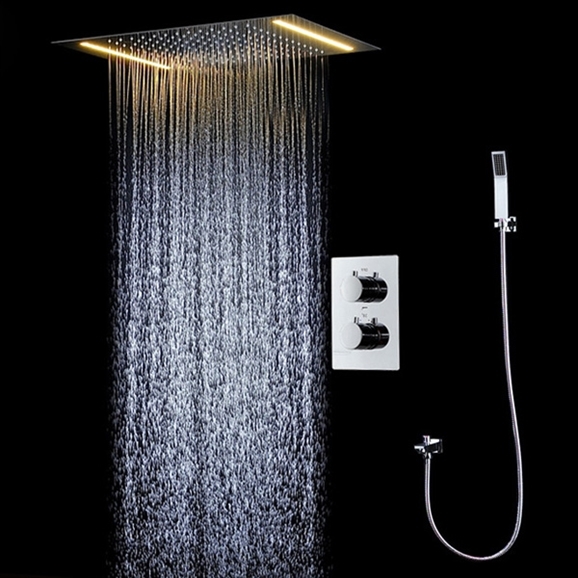
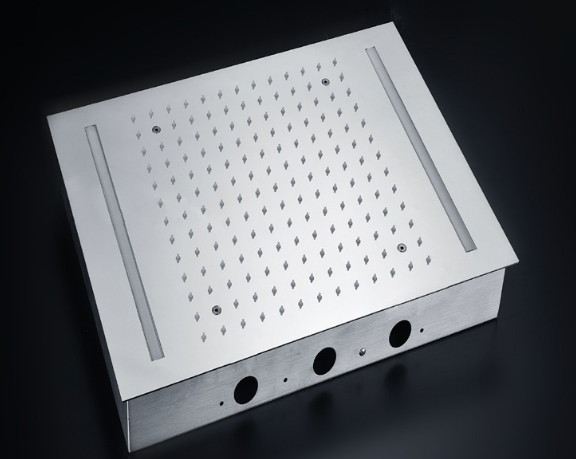
Juno 20×14 Rainfall Embedded Ceiling Mount Single Color LED Shower Head

Follow these installation guidelines before mounting your shower system.
Always observe local building, plumbing, and safety codes, and inspect all parts
before installation.

BathSelect 15″*20″ Large LED Shower Shead with 2 Way Mixer & Handshower, All in One Installation Manuals

Before You Begin

Unpack and inspect the shower system for shipping damage. If damage is found, do not install the product.

Professional Help

Consult a qualified plumber if you are unfamiliar with bathroom fixture installation or plumbing connections.

Code Compliance

Observe all local building, plumbing, and safety codes before starting installation.

Tools and Materials

  • Screwdriver
  • Teflon tape
  • Adjustable wrench
  • Smooth joint pliers
  • Soft cloth
  • Silicone sealant

Installation Steps

1. Attach the upper wall supportSecure the upper wall support to the shower wall using the provided mounting hardware. Use a level to make sure the shower riser is perfectly straight.
2. Seal the wall pipe threadsApply thread sealant to the ½-inch pipe threads in the shower wall and thread on the mounting nuts. Allow sealant to cure for 24 hours before use.
3. Install valve bodies and escutcheonsAttach the hot and cold valve bodies and decorative escutcheons, if included, directly to the pipe threads. Tighten carefully with an adjustable wrench.
4. Mount the hand-held showerIf included, mount the cradle at a comfortable height. Attach the hose to the faucet using the provided rubber washers or sealing gaskets.
5. Attach the shower headConnect the shower head to the top of the riser and tighten with a smooth jaw wrench. Do not tighten more than ¼ turn beyond hand tight.
6. Test the systemTurn on the water supply and open the faucet valves. Check for leaks and verify hot and cold supply operation. Let water run for about 30 seconds to clear debris.
Leakage note: If leakage occurs, tighten connections with your adjustable wrench as necessary. If problems persist, contact customer service.

Product Image Gallery

BathSelect holds a 4.6 out of 5 rating based on
over 14,982 reviews dating back to 2001, reflecting long-standing
customer trust. Customers frequently highlight sleek contemporary designs,
straightforward installation, and responsive support.

Leave a Reply

Your email address will not be published. Required fields are marked *