
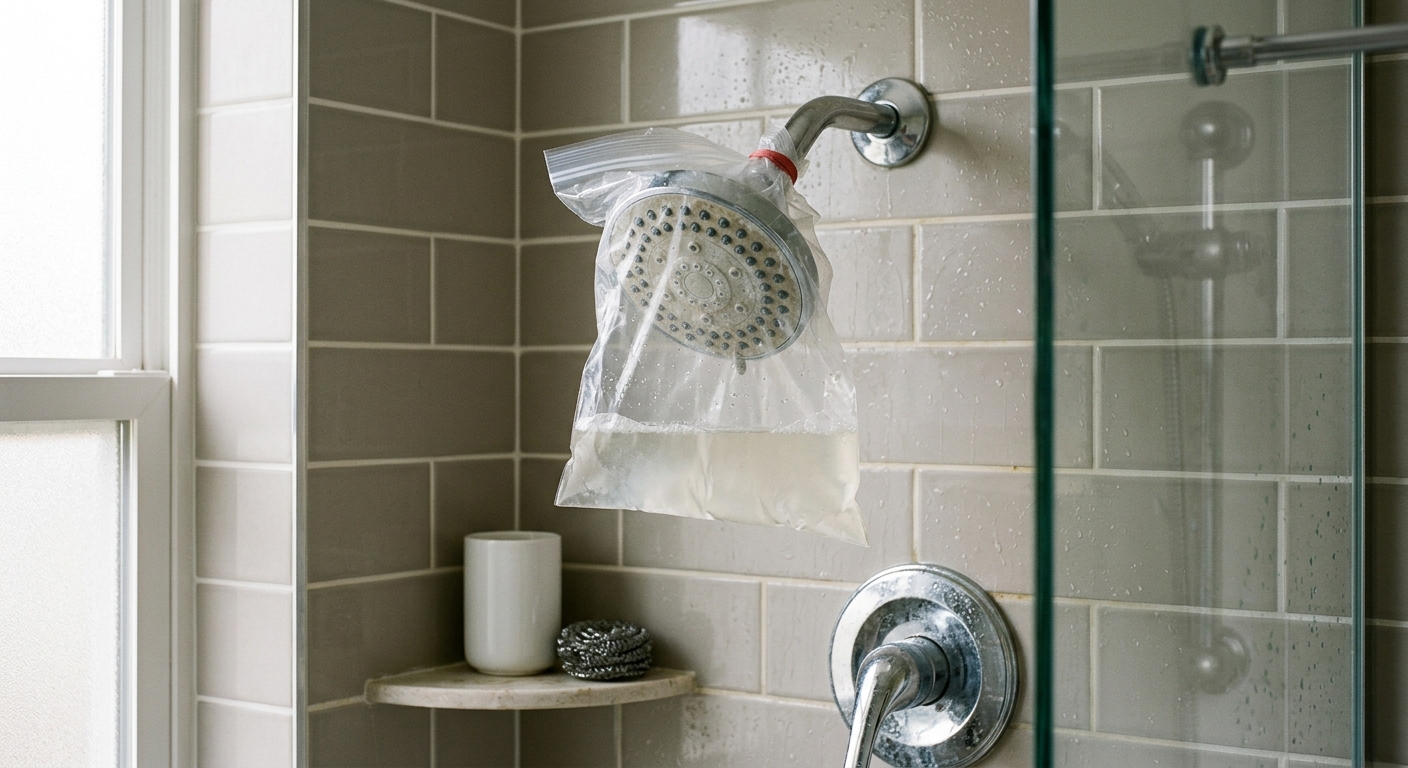
If your shower head is already bagged up with vinegar or a descaling solution, you’re most of the way there. The rest of the job is about getting the dwell time right for your level of buildup, checking pressure before you tear the bag down, and confirming every nozzle is actually clear before you call it done.
Tools and Solutions Needed
Before you go further, make sure you have what’s needed to finish the job properly, not just start it.
- A gallon-size resealable bag or a small bowl deep enough to fully submerge the shower head
- White vinegar (5% acidity) or food-grade citric acid powder
- A rubber band, zip tie, or twist tie
- A sewing needle, straight pin, or a SIM-eject tool (something close to 0.5 to 0.7 mm)
- An old toothbrush
- A measuring cup or a marked container for the flow test
- A watch or phone timer
Citric acid powder is worth keeping on hand if you deal with hard water often. It’s gentler on chrome and rubber gaskets than straight vinegar, and it works faster on heavy mineral buildup once you factor in the longer soak most people already give vinegar.
Bagging Method: Step-by-Step
If you haven’t locked in the seal yet, or you’re troubleshooting a bag that keeps slipping, here’s the sequence that holds pressure and keeps solution from leaking down your arm.
- Fill the bag or bowl with enough solution to fully cover the nozzle face, usually 1 to 2 cups depending on head size.
- Work the bag up over the shower head until the solution line sits above all the nozzle holes.
- Twist the open end of the bag snug against the swivel ball joint, not against the pipe or arm.
- Wrap a rubber band or zip tie around that twist three or four times. The swivel joint is narrower than the shower arm, so this is where the seal actually holds.
- Check for drips after five minutes. If solution is leaking past the tie, retwist and double up the rubber band.
If you’re mid-soak right now and the bag has already slipped once, it’s worth redoing the seal rather than hoping it holds for the rest of the dwell time. A half-leaked bag means half the nozzles never got submerged.
Dwell Time by Buildup Severity
This is the step people guess at, and guessing is why descaling jobs fail. Dwell time depends on both the solution and how long the buildup has had to harden.
| Buildup Severity | White Vinegar | Citric Acid Solution |
|---|---|---|
| Light (visible spots, still some flow) | 30 minutes | 30 to 45 minutes |
| Moderate (several blocked nozzles, uneven spray) | 1 to 2 hours | 45 minutes to 1 hour |
| Heavy (most nozzles blocked, crusted deposits visible) | 2+ hours, or overnight | 1.5 to 2 hours |
Vinegar is weaker than citric acid at the same concentration, so it needs more time to dissolve the same amount of calcium and lime scale. If you’re already past the 30-minute mark and the head still looks heavily crusted, don’t pull it now. Top off the bag with fresh solution and keep going rather than starting over.
Checking Flow Rate Mid-Soak
You don’t have to wait until the bag comes off to see if the soak is working. Every 30 to 45 minutes, untie the bag, let the head drain, and run the water for ten seconds into a measuring cup or marked container. Multiply by six to get gallons per minute.
Know your baseline before you start comparing numbers. Federal law caps standard shower heads at 2.5 GPM. WaterSense-labeled fixtures are capped lower, at 1.8 GPM. If your head is a WaterSense model and you’re reading 1.8 GPM mid-soak, that’s not a clog, that’s the fixture working as designed. The number you’re chasing is whichever of those two is your head’s rated maximum, not the highest number you can get.
If you’re testing a flow-restricted head and getting less than half its rated GPM, reseal the bag and keep soaking. If you’re within 80 percent of rated flow, you’re close enough to move to the nozzle check.
Nozzle-by-Nozzle Pick Test
Flow rate tells you the average, but it won’t tell you which individual nozzles are still blocked. A shower head with ten holes can hit near-full GPM with three holes wide open and the rest trickling, because water finds the path of least resistance.
Once the bag is off and the head has had its soak, go nozzle by nozzle:
- Run the water and watch each hole individually. A working nozzle shoots a clean, straight stream. A partially clogged one sprays sideways or dribbles.
- For anything not spraying straight, insert a needle or straight pin into the hole and work it in and out gently. Don’t force it sideways, you can widen or warp the hole and change your spray pattern permanently.
- If you don’t have a needle on hand, a SIM-eject tool or a straightened paperclip tip works at roughly the same size, around 0.5 to 0.7 mm. Anything thicker risks enlarging rubber nozzle holes.
- Brush the face of the head with an old toothbrush to knock loose any dissolved scale sitting in the gaps between nozzles.
- Run the water again and recheck every hole you picked. Repeat on any that are still weak.
This step is tedious on a head with 50+ nozzles, but it’s the only way to catch the scattered partial clogs that don’t show up in a flow rate test.
When to Remove It Instead
Bagging works because it’s low-effort and doesn’t require tools, but it has limits. If you’ve done two full soak cycles at the right dwell time and you’re still below 80 percent of rated flow, or more than a third of the nozzles fail the pick test, the buildup is probably inside the swivel ball or the flow restrictor itself, not just on the face. At that point, removing the head and soaking it fully submerged, or replacing the flow restrictor, will get you further than another round in the bag.
It’s also the point to consider whether the head itself is worth saving. A shower head with heavy internal mineral buildup after a few years of hard water use is often past the point where descaling restores full performance, and some people use that as a natural upgrade point to add body jets or a thermostatic valve, which usually means looking at complete shower systems rather than a single replacement head.
If the head is removable and you’re already at this stage, soak it submerged in a bowl rather than bagged. Full submersion gets solution into the swivel joint and the back of the nozzle plate, which a bag can’t reach no matter how long you leave it sealed.